 |
In't
Westy's Brilliant ! |
|
| Praying
for dry weather ?
Final hints and tips. |
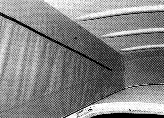
Our finished canvas was a clean fit
both top and bottom, and all it took was a little (?) time and patience. Find below some further tips:1. The flymesh goes on the OUTSIDE. Keep this in mind when initially securing the canvas with a few staples lest you do it inside out. 2. If the vinyl strips around the inside top have become too hard to drive staples through, improvise one of the following solutions: a) Use 3/4" carpet tacks. I went this route. b) Cut 1.25 inch wide strips from those long, vinyl vertically hanging window louvers and use those in place of the petrified vinyl strips. c) Get the thickest duct tape made, make a triple layer of the stuff in a long 1.25 inch wide strip, and use that in place of the petrified vinyl strips. d) Gain the use of an industrial type stapler, either electric or pneumatic. Even the gnarliest spring-loaded hardware store stapler probably isn't up to the chore. e) Boil the strips in water to soften them just before stapling. This might work, but I didn't try it. 3. You have to unbolt the support arms from the poptop in order to deal with the front left and right edges. When unbolted, the arms can be carefully propped in the front corners of the top to support it. When so positioned, the poptop is lifted about 1/2" less high than usual. If you staple/ tack the upper edges of the poptop without accounting for this, the whole front end will be too short once you have reconnected the support arms. Leave yourself some extra room to account for this or you'll have to unstaple/ tack the top edge, let some out, restaple/ tack, and forevermore deal with a row of holes along the top edge that will remind you of your folly from now until the end of time. 4. There's not much room to work when screwing down the rear portions of the canvas. An electric screwdriver may not fit back there without a swivel joint. Small handheld screwdrivers may work better.5. It helps to use a sharp thing (an bradawl or nail, or tack) to poke holes through the lower edge and find the screwholes beneath before you start trying to drive screws in. 6. It takes a deep socket (or otherwise small outer diameter) socket wrench to unscrew the nuts holding the square metal bar to the inside front ceiling of the poptop. And you must remove this thing to get at the front edge of the canvas. Check it out and be sure you have the right tool before you settle down to do the job. Well that about does it, if you have any questions why
not drop me a line or post them
on my forum. |
 |